
Register for Classes
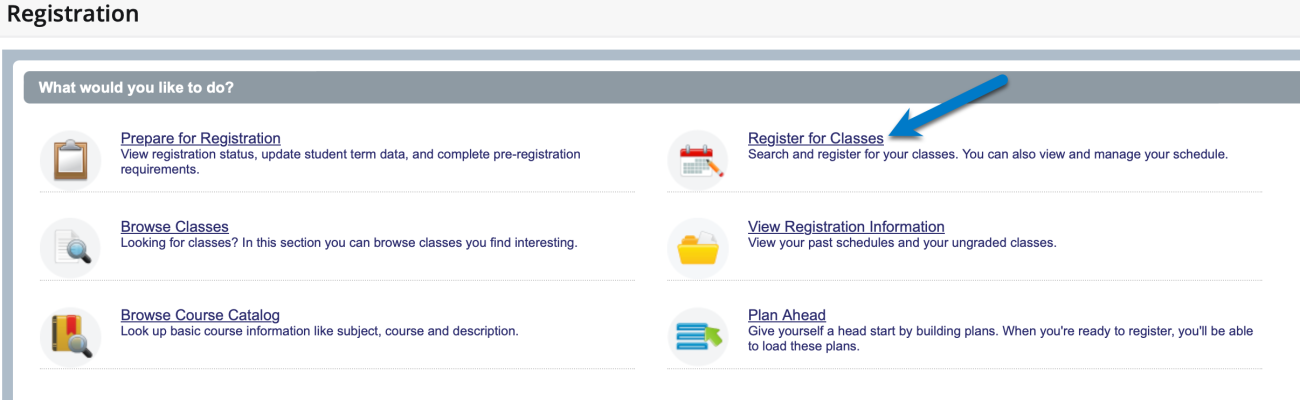
Registration can be completed in Web4U as soon as the student's registration portal is open. The Register for Classes section allows students to find classes, enter CRNs, visualize their schedule (and schedule detail), and review a summary of their registered courses.
This guide provides a walkthrough of these options. You can select any of the links below to be taken to the section you seek information about.
Web4U Guide
Resources
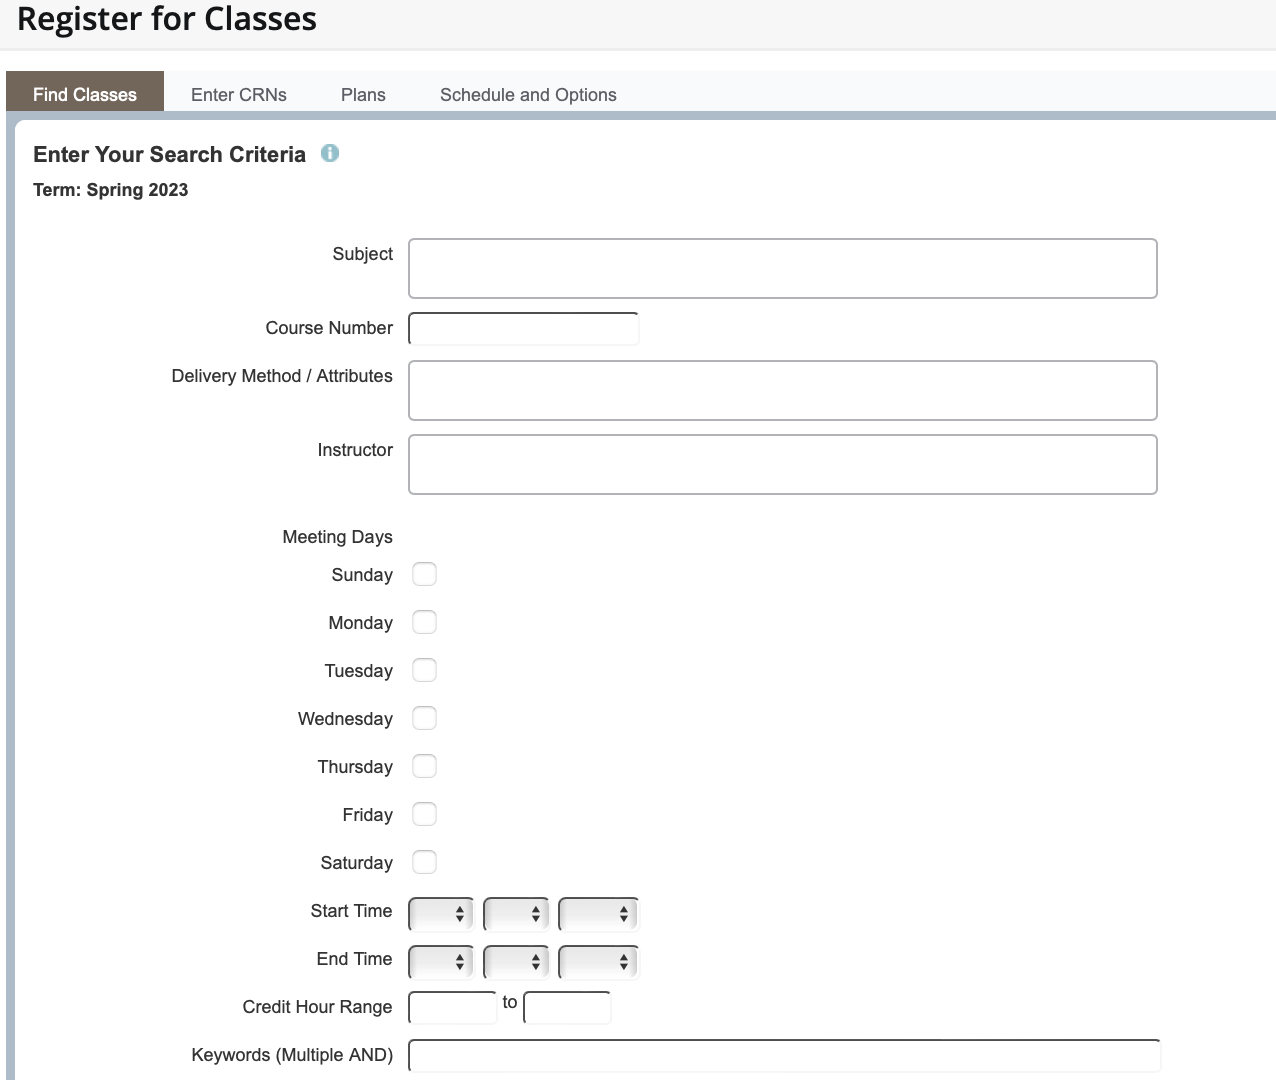
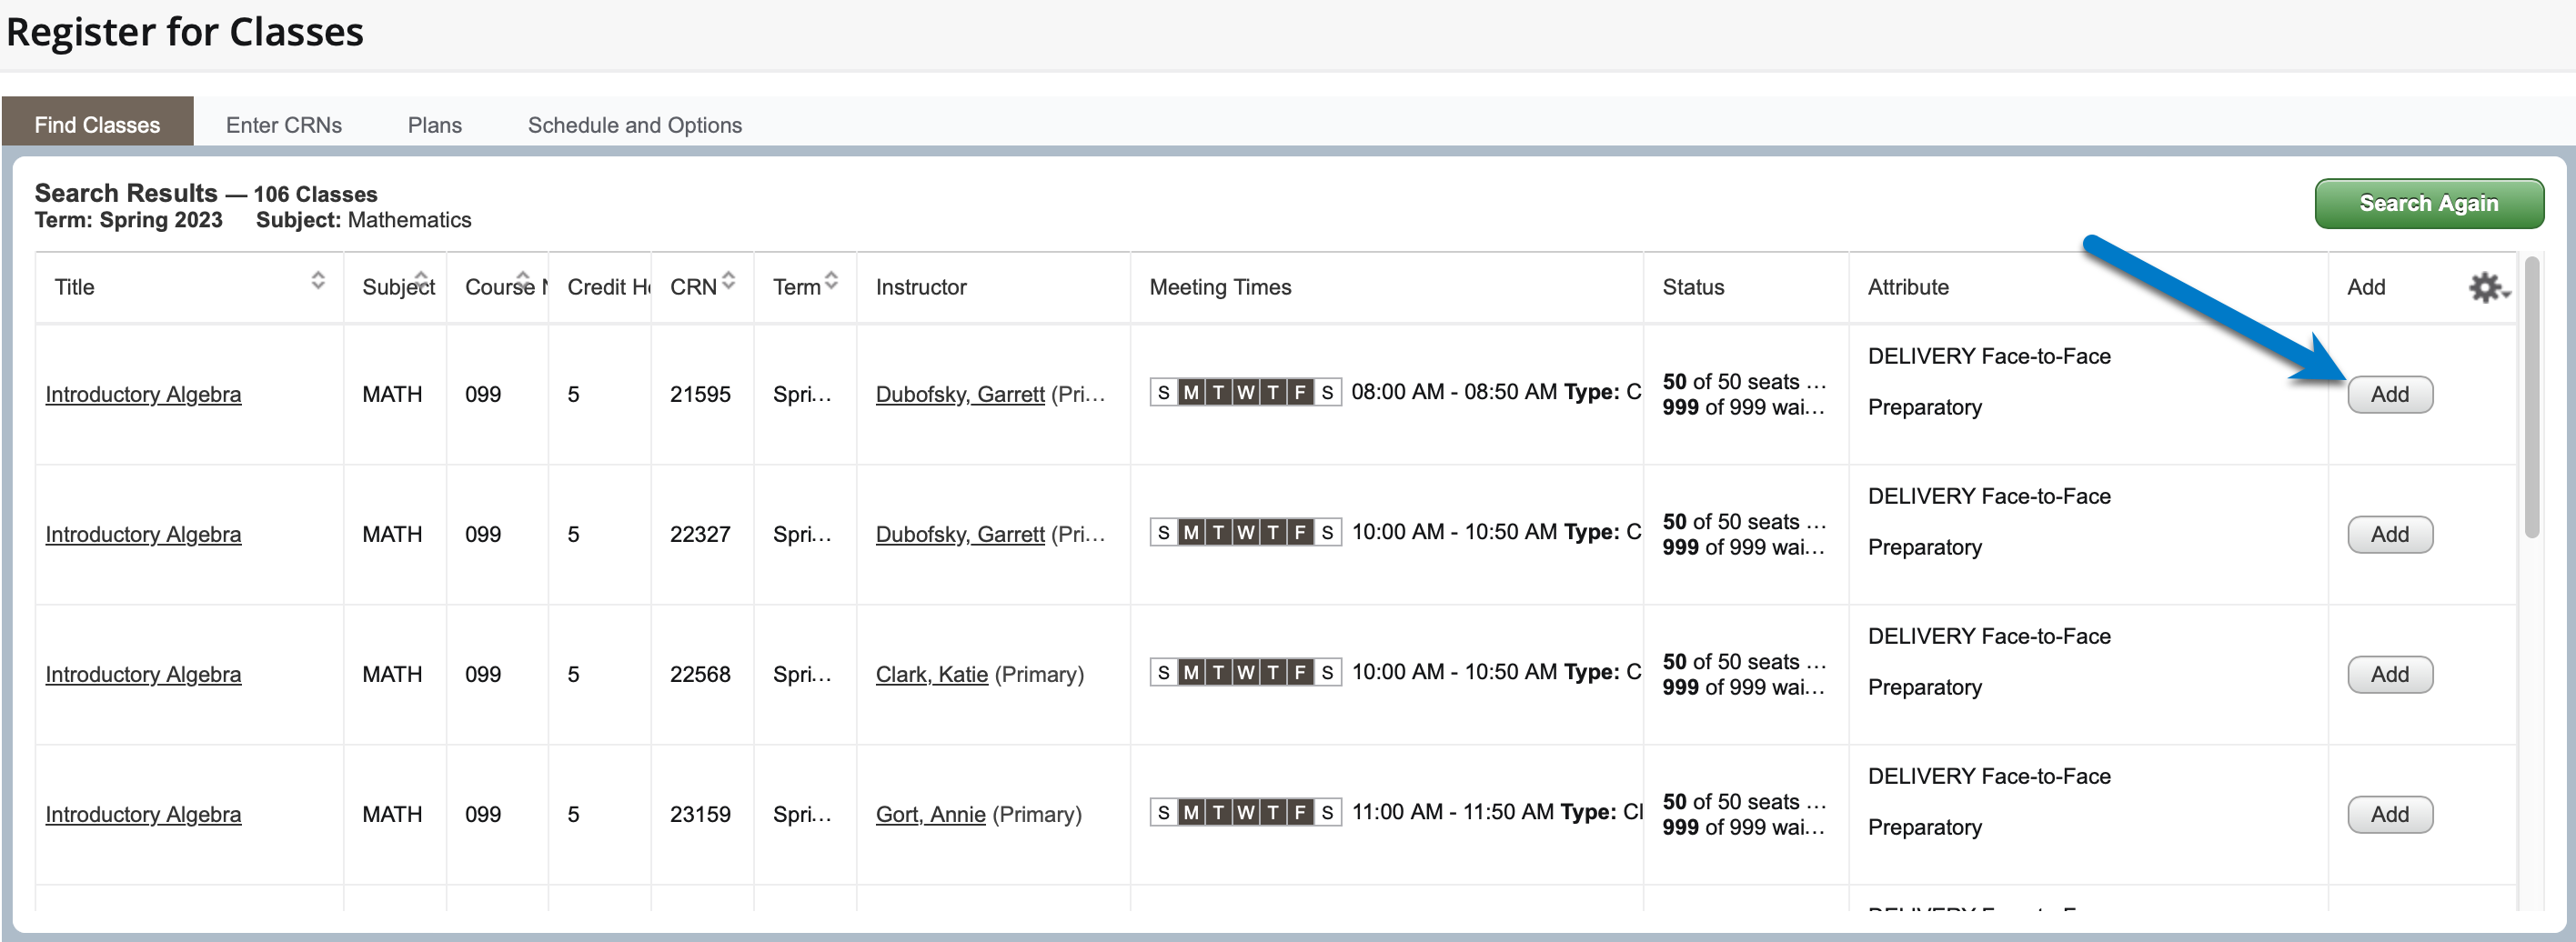
The Find Classes feature allows you to search for courses for the selected term. This feature works similar to Classfinder or Timetable from previous terms. Some fields in this feature will have a drop-down with potential options when selected.
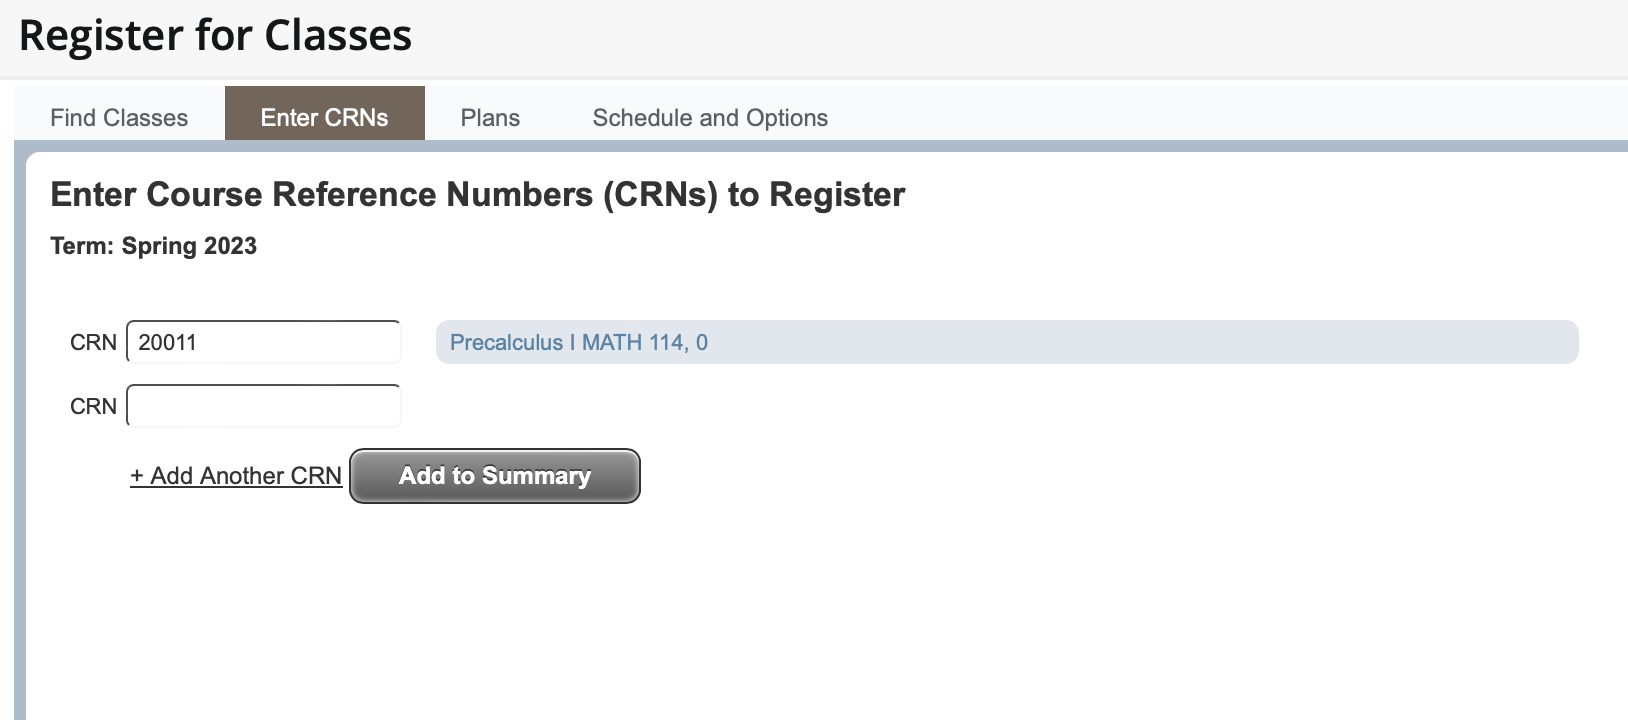
This feature allows you to add multiple CRNs and then add them to your Summary.
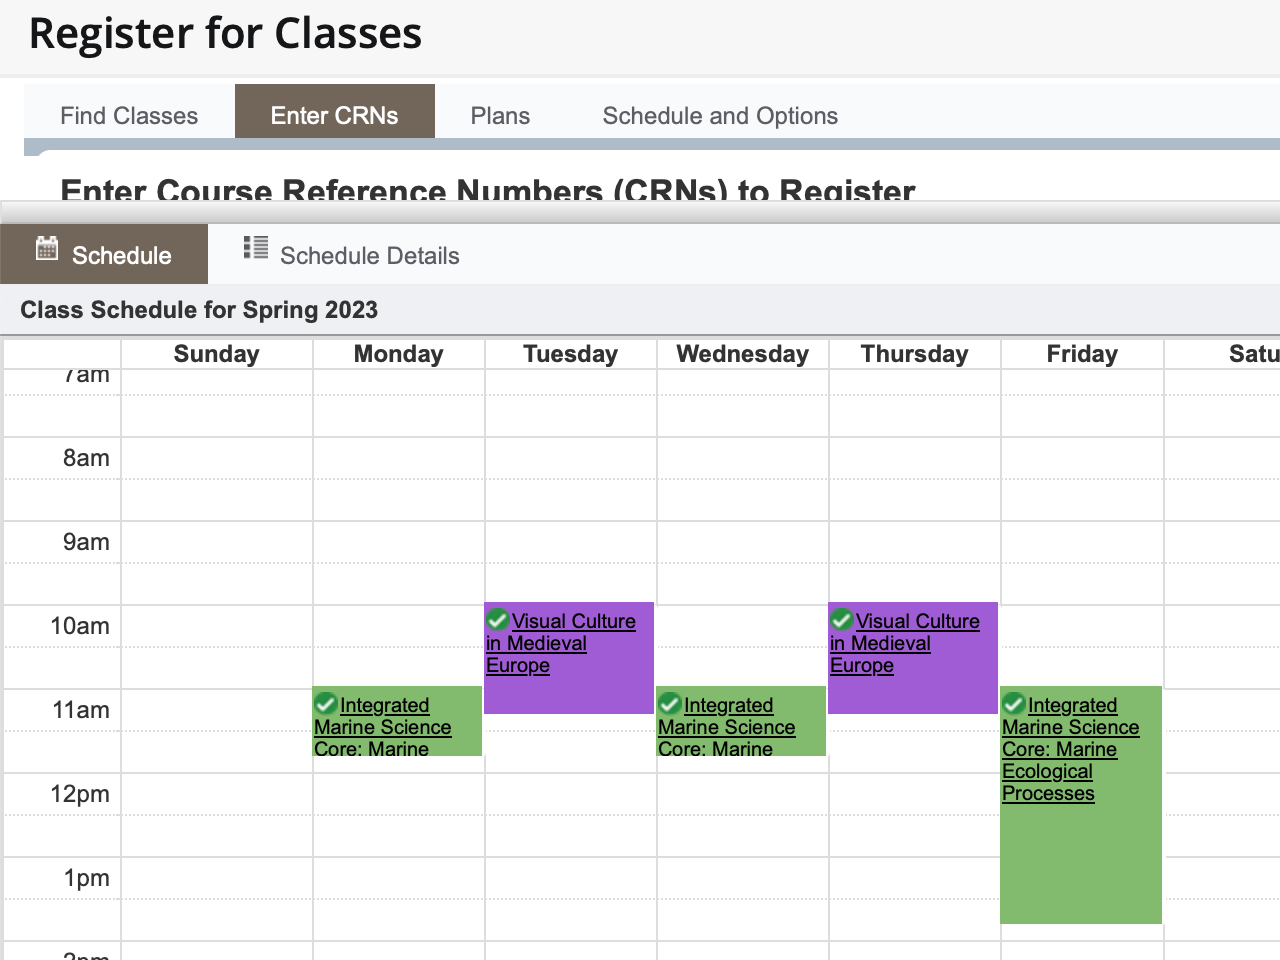
This feature showcases courses that are listed in the summary. Here you will be able to see a schedule-based overview of dates and times for the courses selected.
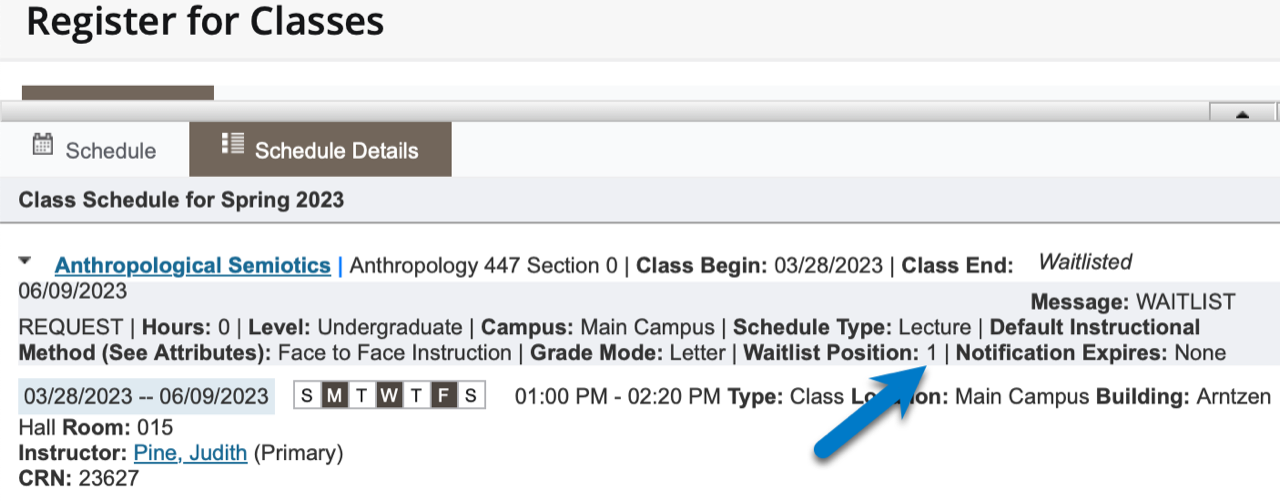
The Schedule Detail tab provides insight into class specifics, including instructor and location.
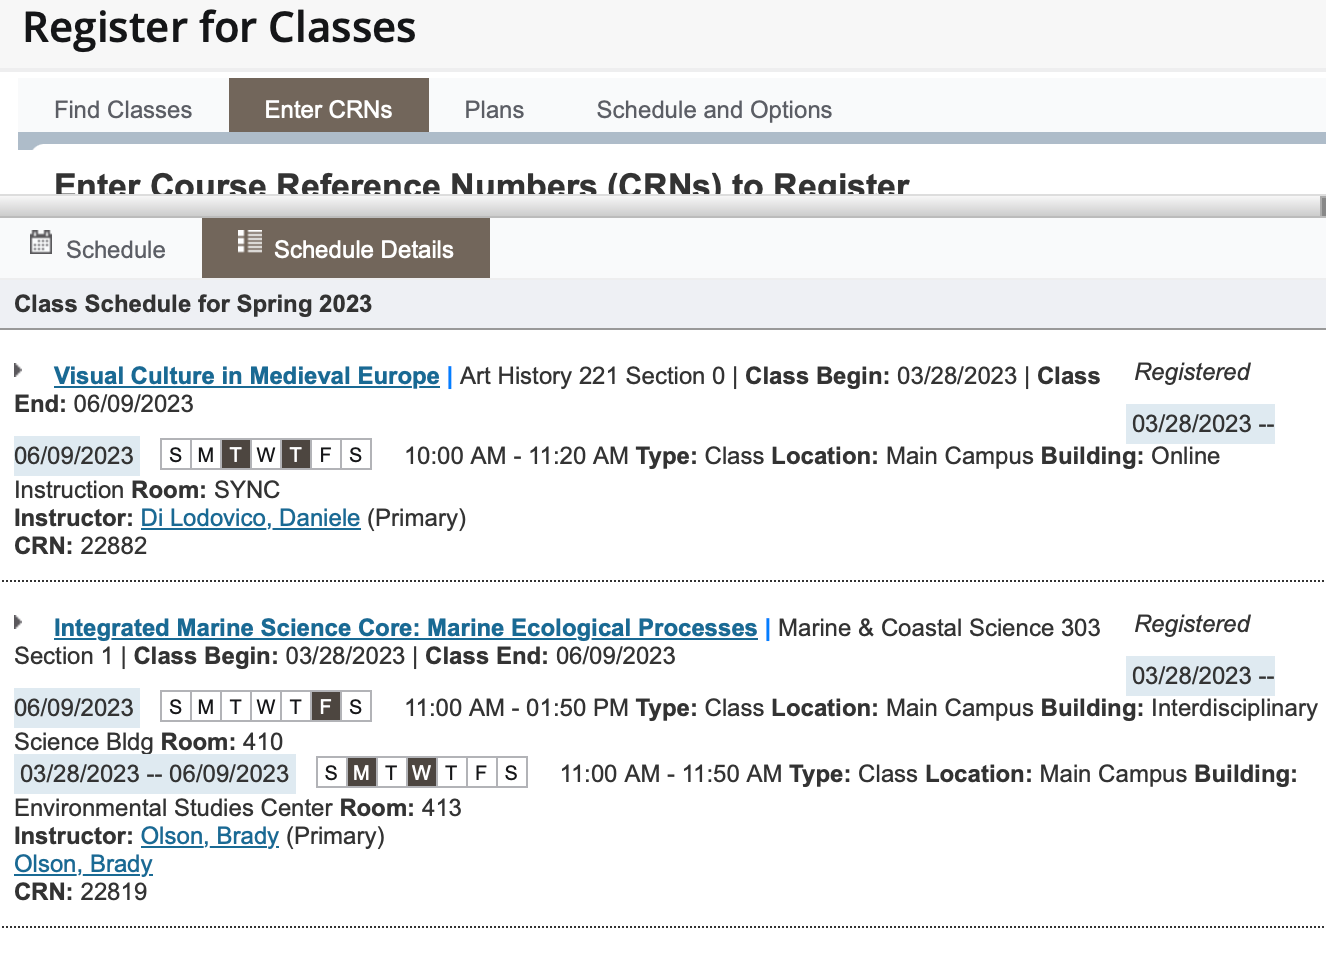
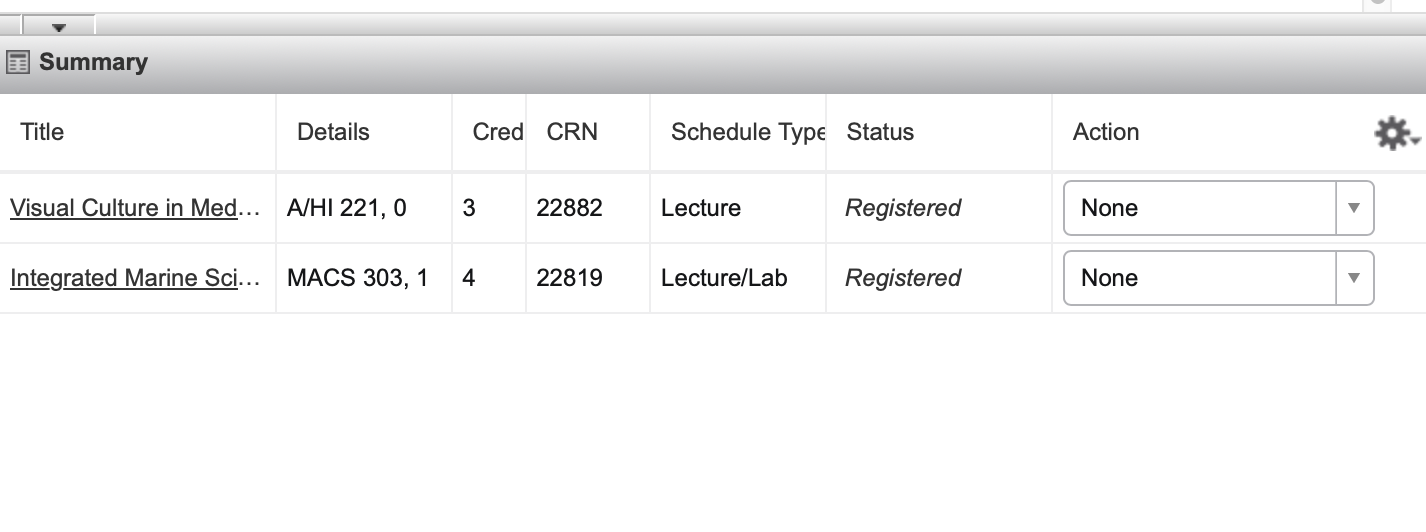
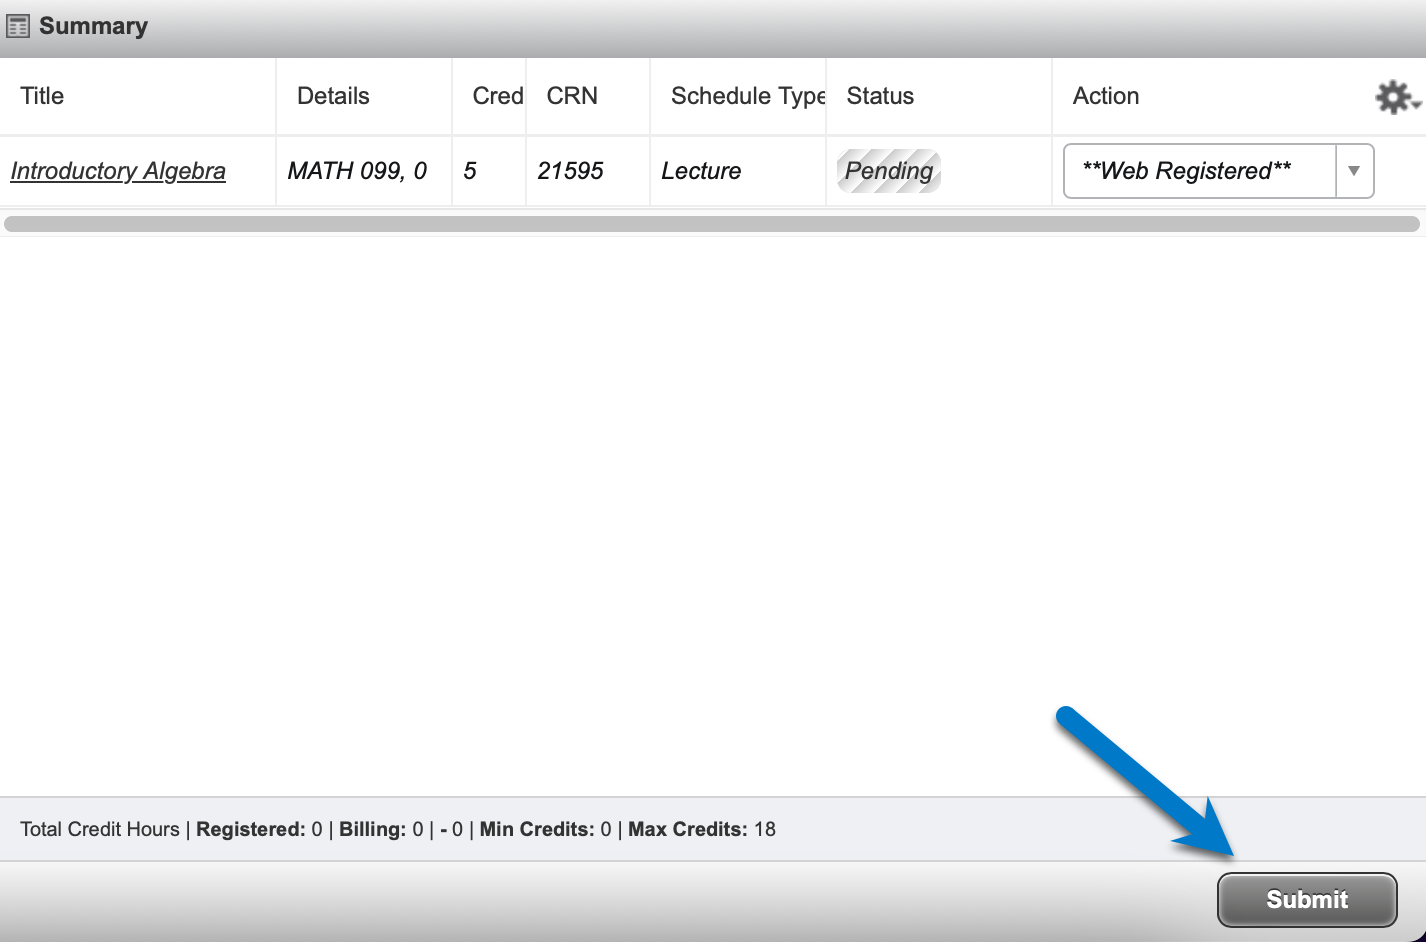
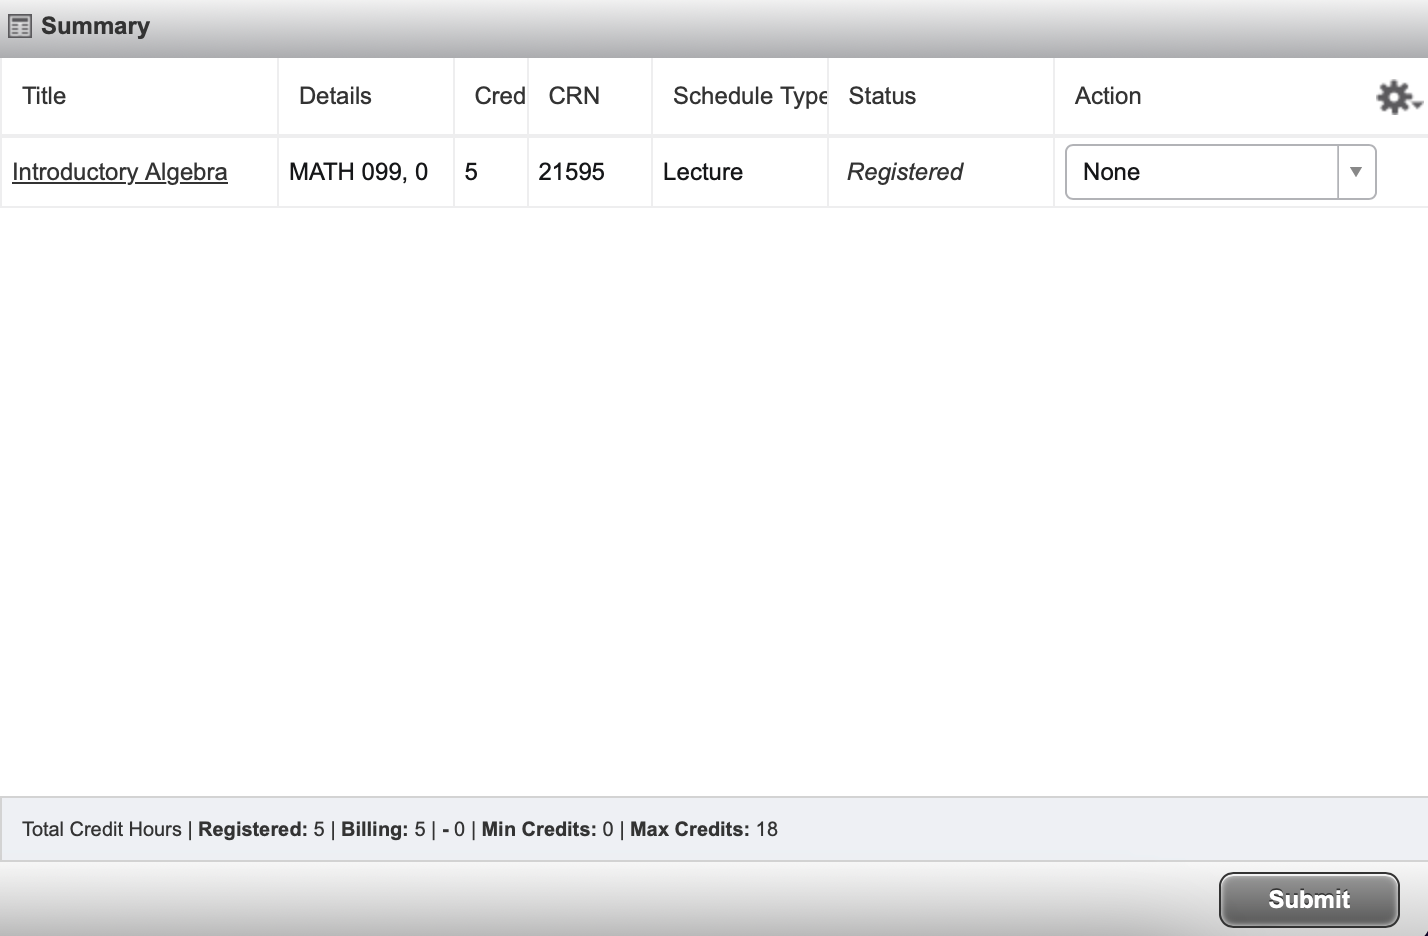
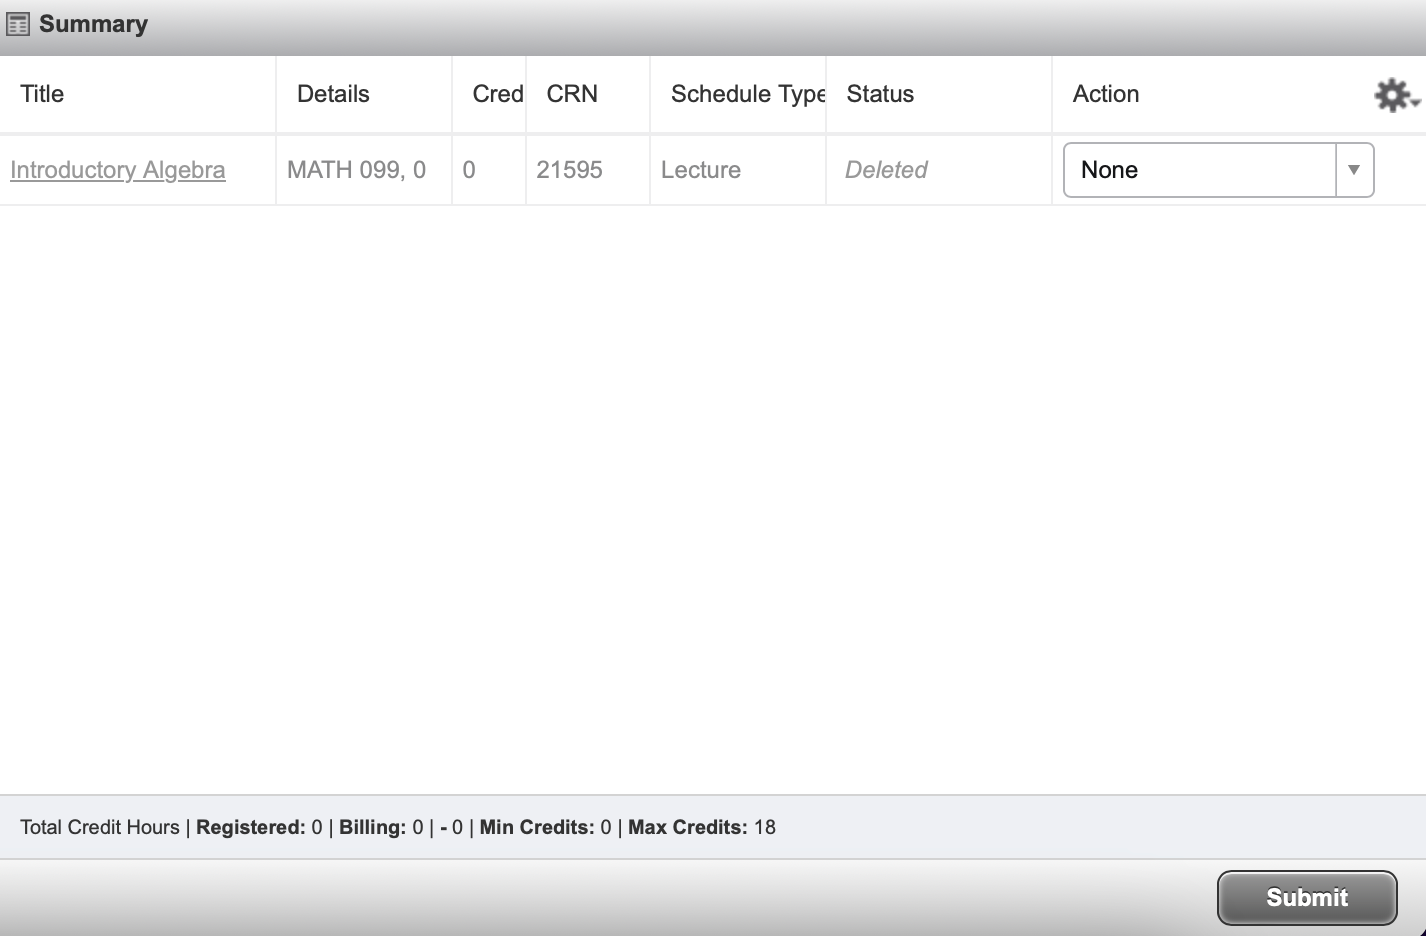
The Summary section will highlight all courses that have been added from the Find Classes or Enter CRN sections. This provides details such as CRN and Schedule Type and also indicates the registration status of the course. The action column features a drop down that allows students to take further actions.
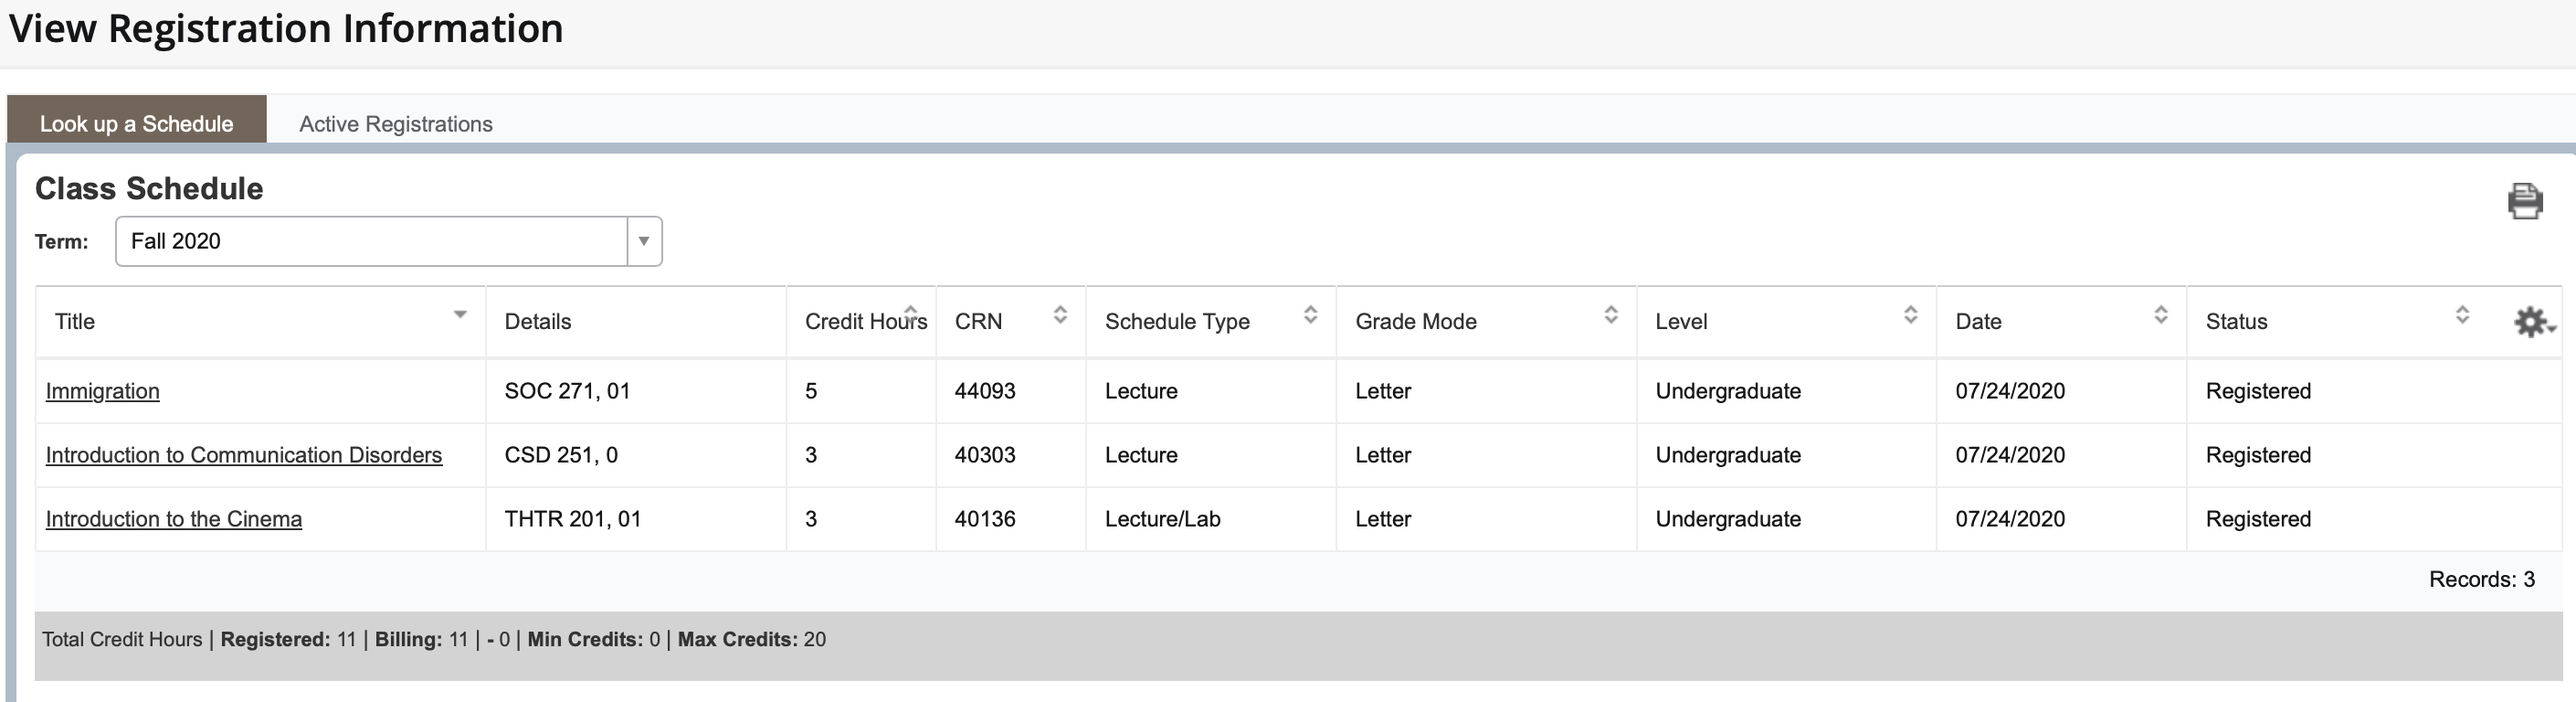
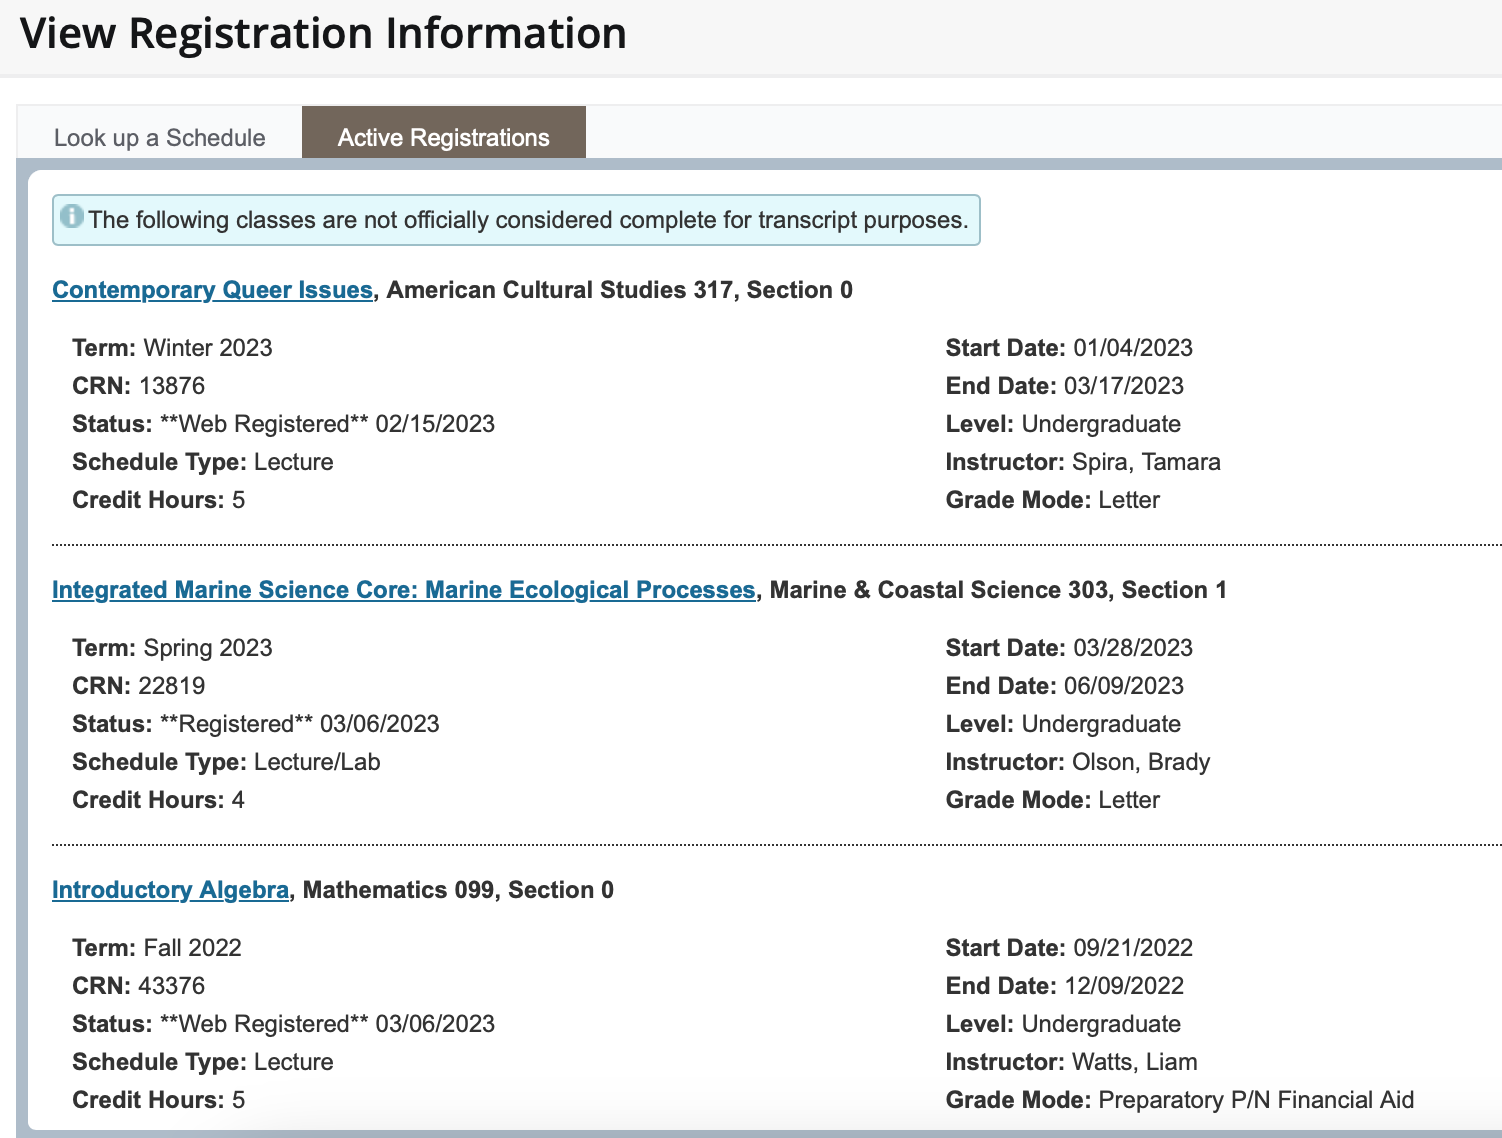
This feature can be accessed from the Registration tab before entering Register for Classes. This feature is an important tool to confirm your class schedule and active registrations.
Look up a Schedule:
Active Registrations:
Students can modify their schedules in Web4U through the schedule adjustment period. During this period, students can add classes without needing an override code (unless otherwise restricted). Classes can also be dropped in this tool.
To add a class: Find Class to Add > Select Add Button > Select Submit > Confirm Schedule
Once a student has selected a class they would like to add, it will populate in the summary section with a pending status. Students must hit the submit button to change the status to registered (if no restrictions apply). To confirm this has happened, students can view their current credit amount on the same screen.
#1
#2
#3
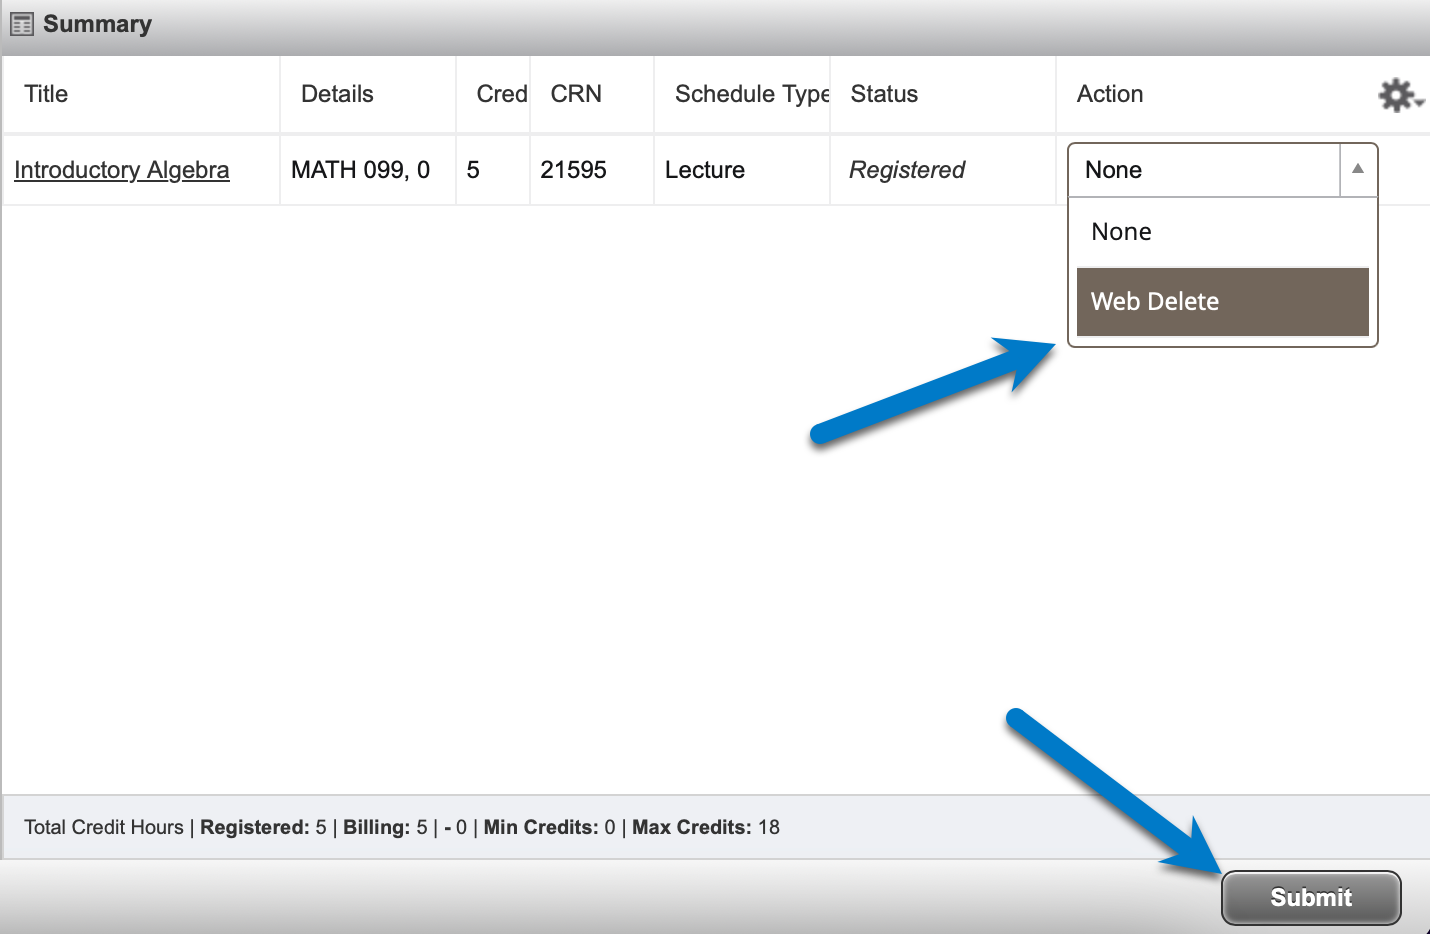
To drop a class: Select Drop-Down > Select Web Delete > Select Submit > Confirm Schedule
To drop a course, students must choose Web Delete from the drop down menu of the specific course. After submitting, the status of the class as well as the credit amount for the term will update.
#1 & #2
#3
Important things to know about schedule adjustment:
Schedule adjustment period dates are listed in the Important Dates & Deadlines for the term. Adding or dropping classes may have implications on financial aid or the total amount of tuition due on the student bill.
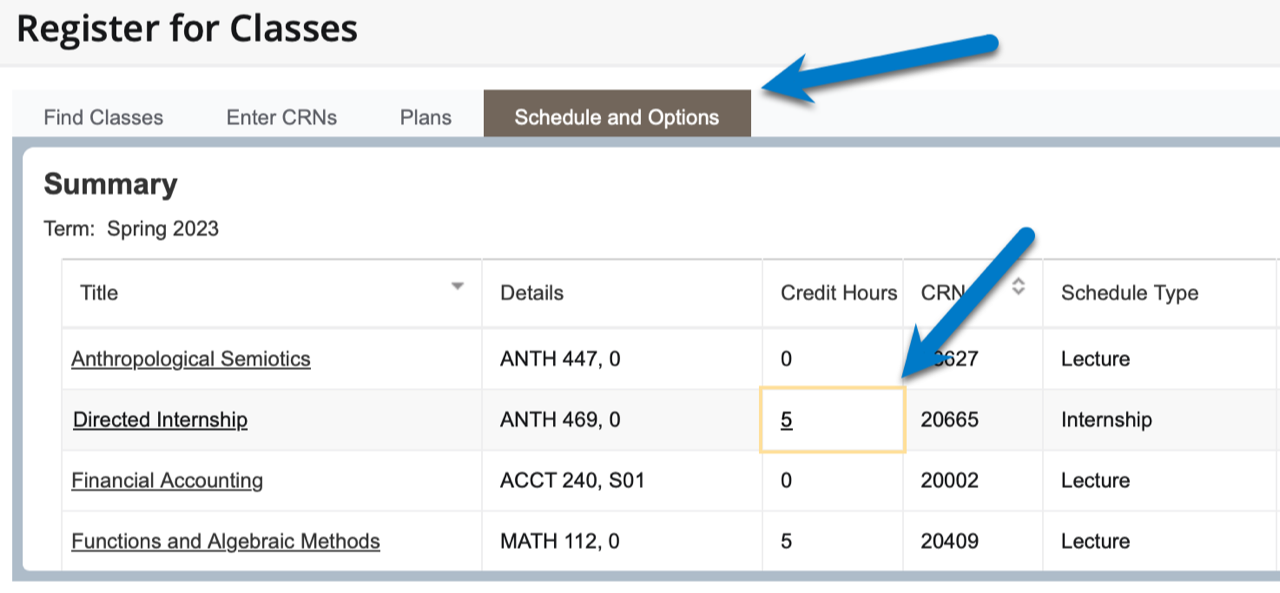
Variable Credit Courses
Certain courses are offered for a variable number of credits. After registering for the course, you may need to adjust the credit amount. The web will automatically register you for the least amount of credit; you will then need to go back to the Registration menu, navigate to Schedule and Options, then select the credit hours to be allowed to update this.
After the fifth day of registration, the Registrar's Office will need instructor permission (via email) to make variable credit changes.
Students may encounter any number of issues when attempting to register for a class. For pedagogical reasons, some courses are restricted to certain levels of students, to students who are declared majors, or to those who have received special permission from the instructor.
Students are responsible for ensuring that they have satisfied all prerequisites before registering for a course. A student who has registered for a course without satisfying prerequisites may be required to withdraw from the course by the instructor.
Because of high demand for many courses, departments often must give enrollment priority to students for whom specific courses are requirements. If a department restricts a course to its declared majors the department must also allow in the course other declared majors for whom the course is listed as a requirement.
It's also important to note that once an override has been issued by the instructor or department, it is still necessary for the student to register for the class.
Many of these are listed below and our office is available to answer any questions you may have regarding course restrictions.
If a course is restricted and requires permission, students may request an override clearance from the instructor or department office. Override restrictions are designated with an OV.
Overrides requirements can vary depending on the situation and are issued at the department level:
- Instructor Approval - necessary when a course is restricted by the OV status
- Repeat - necessary when repeating a course
- Capacity - necessary when given permission to attend a course that is already at capacity
- Time Conflict - necessary when given approval to take two courses concurrently
Program specific restrictions require students to be admitted to the program in question to register without issue. If not in a specific program (i.e. not yet declared or accepted), students will need to seek out an override for the course. Overrides are provided at the discretion of the instructor in these cases.
Program specific codes include:
MJ - Major
PM - Pre-Major
GR - Graduate School
PB - Post-baccalaureate
Certain courses may be restricted by class status. A course with an SO restriction will only be available for students who quality at that level. Contact a course instructor to learn more about potential overrides into these courses.
Class status codes include:
FR - First-year
SO - Sophomore
JR - Junior
SR - Senior
Courses with an Instructor Permission restriction require an override to be placed by the instructor. These are permitted at the discretion of the instructor and are not provided from the Registrar's Office.
Some courses may have a prerequisite based on having taken a certain course (or courses) prior to registration. To bypass this restriction, reach out to your advisor or the specific instructor to discuss you options.
When a course is at full capacity and a student would like to add themselves to the waitlist, they can select the Add option to begin the process.
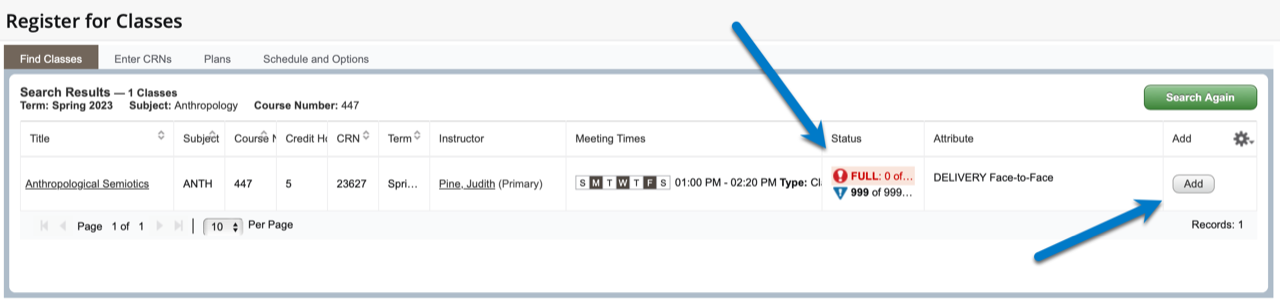
The system prevents students from registering for a full capacity course with the error message shown. The Waitlist Request option is in the drop down box next to the course in question.
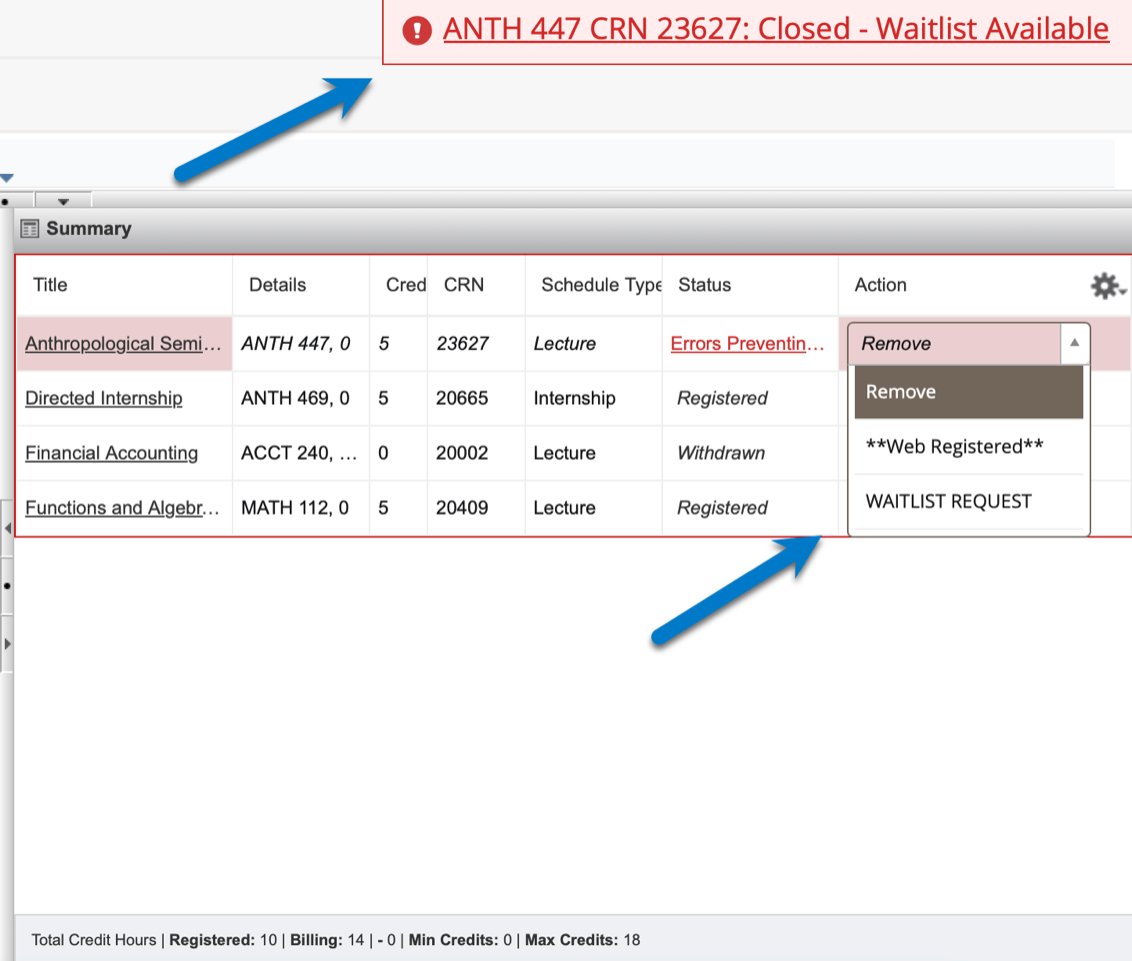
After selecting the Waitlist Request option and submitting, the course status is listed as Waitlisted.
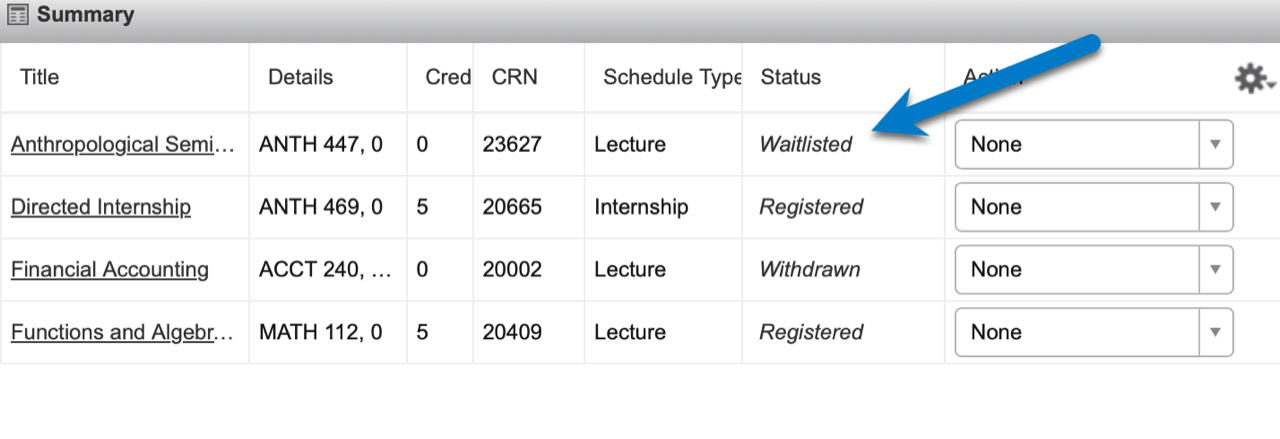
To confirm or review your position on a waitlist, you can navigate to the Schedule Details section of Register for Classes.
Web4U is a web-based academic planning tool for students. It allows them to easily find classes and build schedules that coincide with busy life and time commitments. This resources assists with planning, reviewing, and creating the most efficient class schedule.
Web4U is found by accessing myWestern and selecting the Web4U link near the top of the page. You can also access the tool from the link at the top of this page.
Whether you've met with an advisor or reviewed your required classes in DegreeWorks, you are able to schedule your upcoming course schedule as soon as the next term is populated in the system. You will not be able to register until your registration portal has opened.
It is important to review future classes to ensure they are available for the term you want to take them. Some courses may also be marked as closed as specified by the department or instructor. You can still generate a schedule with closed classes, but you will not be able to register until the course is opened or an override code has been approved.
Go to "course status" and change this to "Open & Full w/Waitlist Open."
Use the tab labeled “Search by Course Attribute.” This will allow you to search courses by specific attribute.
No. Search for your class, click add class, repeat until all classes are visible in the list on the right. Once all are shown, click “done” to return back to the schedule screen.
After generating your schedule, you can click up to four schedules and compare them in one window. Choose the schedules you want to compare, then click “compare.”
Check the square box to select all courses and click the X button to delete them all. You can also select the X next to a course in the “Course List” to remove an individual course.
Yes. Once you’ve selected your courses and are on the main screen, click the “options” button next to each course to view course sections. From there you can view all sections with meeting times, instructors, and open seats. Check the boxes that correlate to the courses you want included in your schedule. Click “save & close.” On the Main Screen, click “generate schedule” to view results.
Go to "add course" and then go to the "search by instructor" tab.
There are several modes of instruction: Face to Face, Hybrid, Online with no specific meeting time, and Online with specific meeting time. Please note Hybrid course includes face to face interaction in a classroom as well as online learning.
If a course has a prerequisite, check the details of the course or search for the course in the WWU Catalog.